LED guide
| LED | Definition |
|---|---|
| Blue |
|
| Blue and Green |
|
| Green |
|
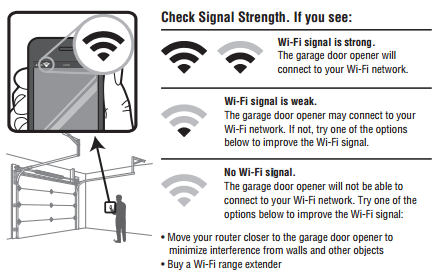
Test the Wi-Fi signal strength
- Verify the mobile device is connected to your 2.4 Ghz Wi-Fi network.
- Hold the mobile device in the place where the Garage Door Opener will be installed, and check the Wi-Fi signal strength.

Connect the Wi-Fi Garage Door Opener to the Wi-Fi Network
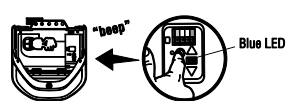
- Put the garage door opener into Wi-Fi Setup mode by pressing and releasing the yellow Learn button on the garage door opener (i.e., motor) two-three times. The garage door opener beeps once, and a blue light flashes. You have 20 minutes to complete the connection process.

- On a mobile device or laptop, connect to the Wi-Fi Network with the “MyQ-“ prefix.
- Launch the web browser on that device and go to setup.myqdevice.com. Follow the on-screen prompts to connect the garage door opener to the property’s Wi-Fi network. When instructed to download the MyQ app, proceed to the next section of instructions. Do not register the device using the MyQ app.
Note: If the option to scan for Wi-Fi networks does not appear along with other Wi-Fi prompts, select Erase Wi-Fi on the MyQ device setup site to clear previous Wi-Fi informationand allow the Scan option to appear.
Register the Wi-Fi Garage Door Opener using the Alarm.com website
If the device has already been registered with a MyQ or Alarm.com, make sure to delete the device from the LiftMaster MyQ website or the Manage Devices page of Alarm.com.
- Go to the Alarm.com Manage Devices Page. Log in if necessary.
- Click Add Device.
- Click Garage Door.
- Select the desired LiftMaster device.
- Click Next.
- Follow the on-screen instructions to complete the device installation.
Note: This serial number is separate from the Product S/N. Look for the
 logo to find the correct serial number.
 - The page displays a pinwheel, indicating that the device is being added. When finished, it redirects to the Garage page, where the new devices are listed.
.png)


